
A sloped roof can be represented by a roof made up of a concrete slab, a multilayered panel on structural mesh, sandwich panels, etc.
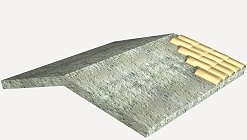
Roof made up of concrete slab:
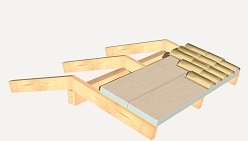
Multilayered panel on structural mesh:
Once all the floors of the building have been created and the external walls, interior partitions, openings and floor slabs have been entered, the roof is defined. To do this, once you are on the "Roof" floor, select "Architecture" > "Building elements" > "Floor slabs" and, in the floating menu that appears, click on the "Roof" button. After selecting the thickness of the roof, enter a closed outline for each sloping roof side.
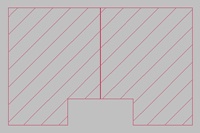
Then, specify the sloping roof sides using the "Introduce elevation changes in roofs" option.
Please note that:
- At the intersection of the two sloping roof sides you have two points at each vertex (one for each sloping roof side) and entering an elevation change for one of them will not automatically assign the same elevation change to the other one.
- You are defining drawings, so you must force the level difference to three points per side, no more, no less.
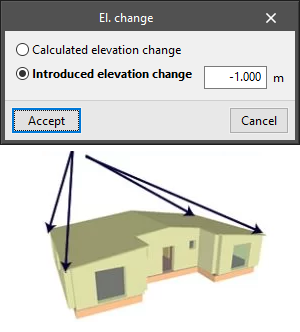
Please also note that these elevation changes are referenced to the initial height of the "Roof" floor (0 m, as no height can be defined on this floor). Therefore, depending on the height used to define the top floor, the elevation changes entered in the sloping roof sides will be different:
If the height of the top floor (h1) includes the roof, negative values should be entered for the elevation change of the cornices (eaves), indicating that these points are below the floor level.
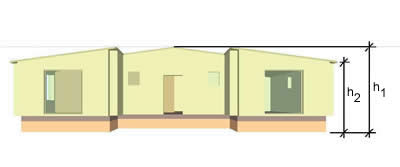
h1: height of the floor
h2: height of the floor - height of the roof
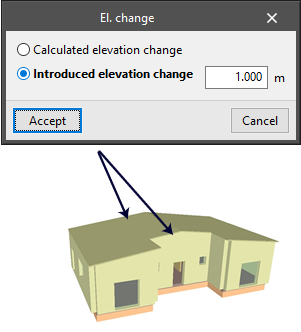
If the height of the top floor (h1) does not include the roof, positive values should be entered at the ridge, indicating that these points are above the floor level.
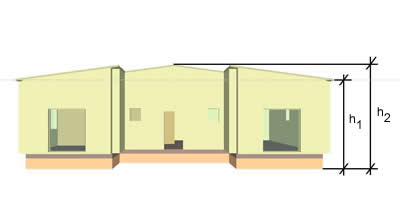
h1: height of the floor
h2: height of the floor + height of the roof
Attics can also be created.