The attached link allows you to download a zipped file (bibs.rar) containing reinforcement tables with metric reinforcement that can be used with US standards. These reinforcement tables only have a few entries and must be filled in manually to be fully functional.
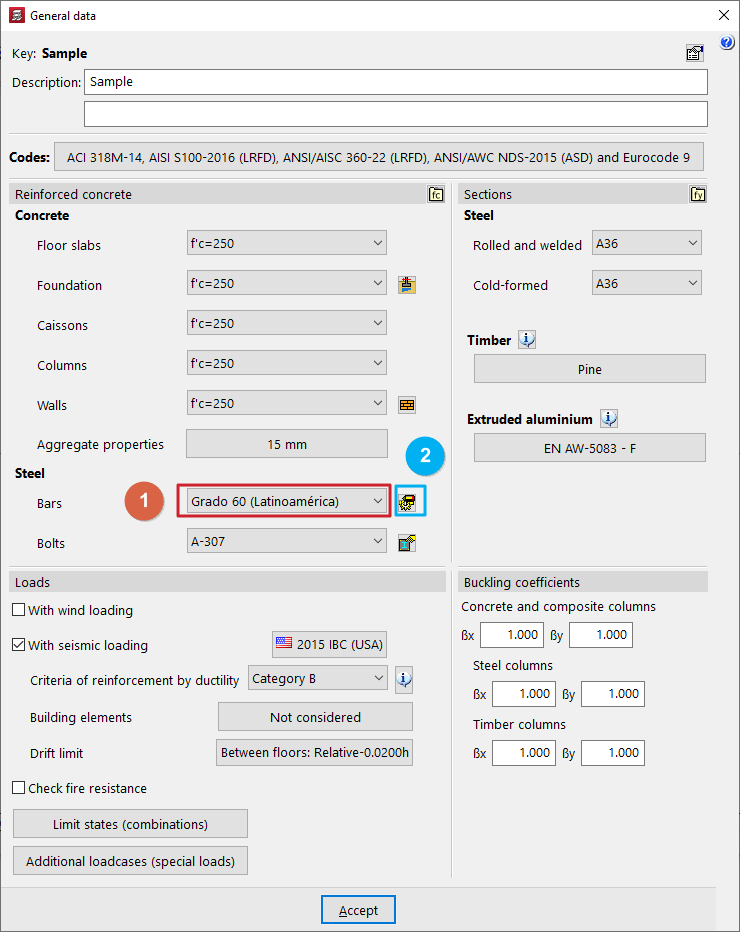
To import these reinforcement tables, access "Job" and "General data" and, in the "Steel" section, click on the drop-down menu "Bars" and select "Grado 60 (Latinoamérica)" (1). This option enters reinforcement in the metric system with the aforementioned standards.
Then click on "By position" (2) to open the "Steel types in bars" window.
Flat slab reinforcement configuration
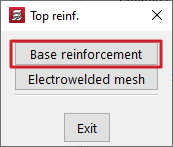
Once in the "Types of steel in bars" window, in the "In slabs, waffle and joist floor slabs", click on the blue buttons to the right of the "Top" and "Bottom" sections and then select "Base reinforcement".
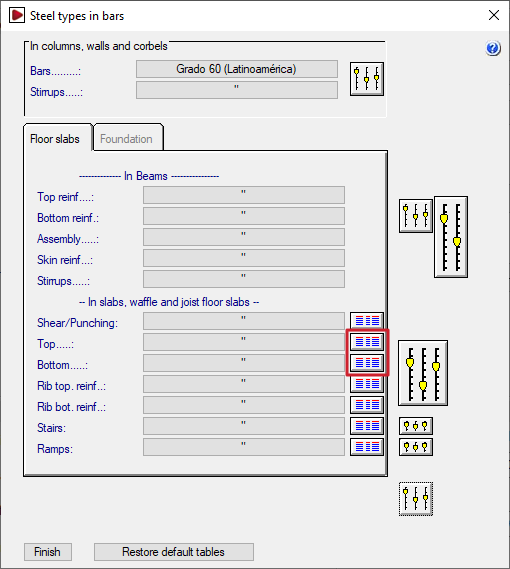
In the "Slab top reinforcement tables" and "Slab bottom reinforcement tables" windows, respectively, "Flat slabs: upper reinforcement (metric diameters)" and "Flat slabs: lower reinforcement (metric diameters)" are selected.
In this way, top and bottom reinforcement tables are selected for flat slabs using only metric diameters.

Beam reinforcement configuration
First of all, unzip the content of the bibs.rar file provided in the following folder: C:\Users\Windows_user\AppData\Roaming\CYPE Ingenieros\v2025\config\bibs
In the "Steel types in bars" window, in the "In beams" section, click on the leftmost button with the yellow equalisers. In the "Beam options" window that appears, select "Beam reinforcement tables" and then "Assembly reinforcement in rectangular sections".

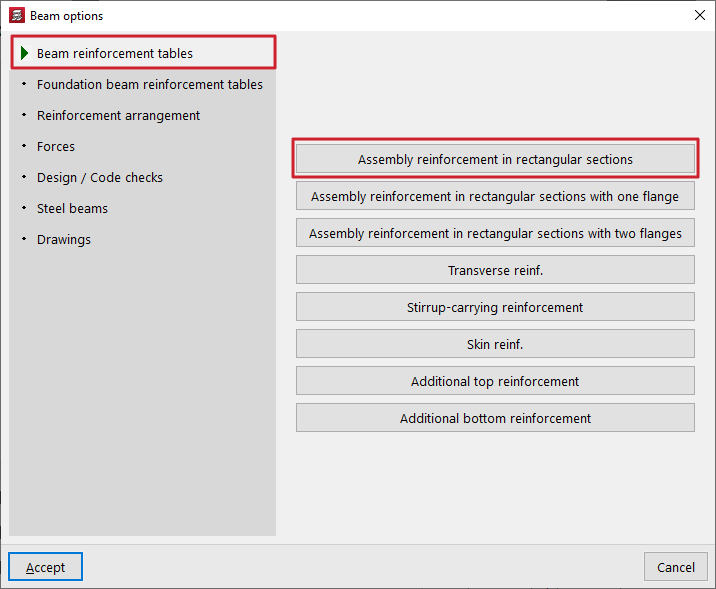
Here, click on the "Import" option in the right-hand column and select the following file: Assembly reinforcement rectangular sections (metric).

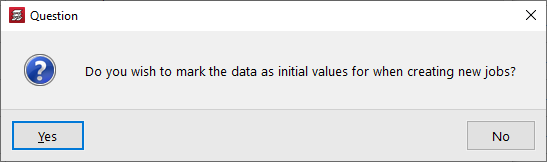
The program will offer the possibility to mark the data as initial values for creating new jobs.
For foundation beams, from the "Beam options" window, select "Foundation beam reinforcement tables" and then "Assembly reinforcement in rectangular sections".
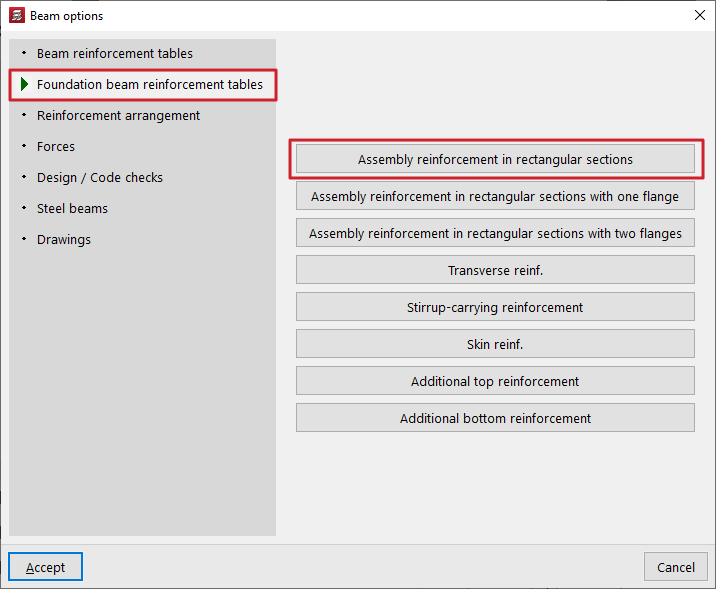
Here, click on the "Import" option in the right column and select the following file: Foundation beams assembly reinforcement rectangular sections (metric).
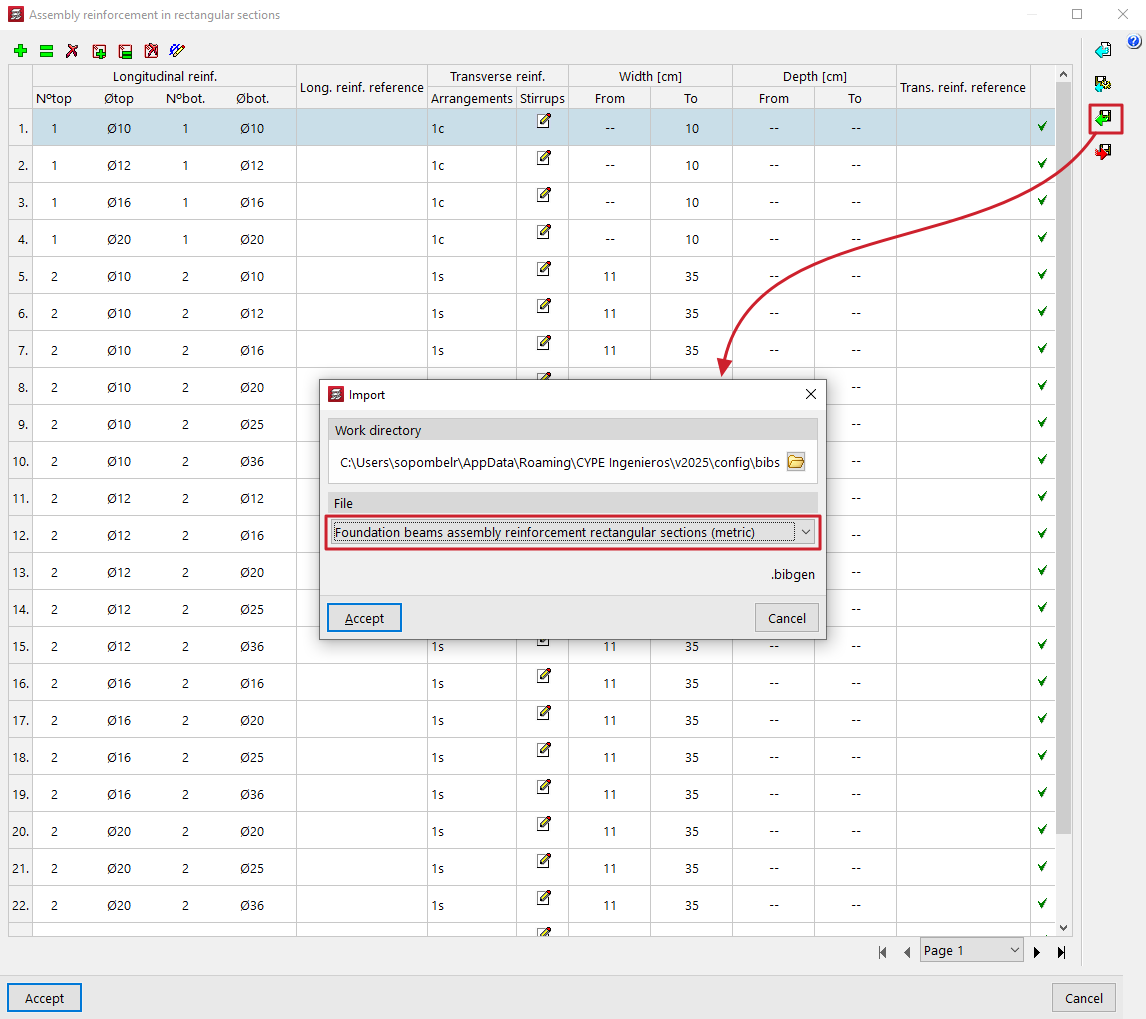
After importing the data, the assembly tables can be completed or modified with the other tools offered in this window.

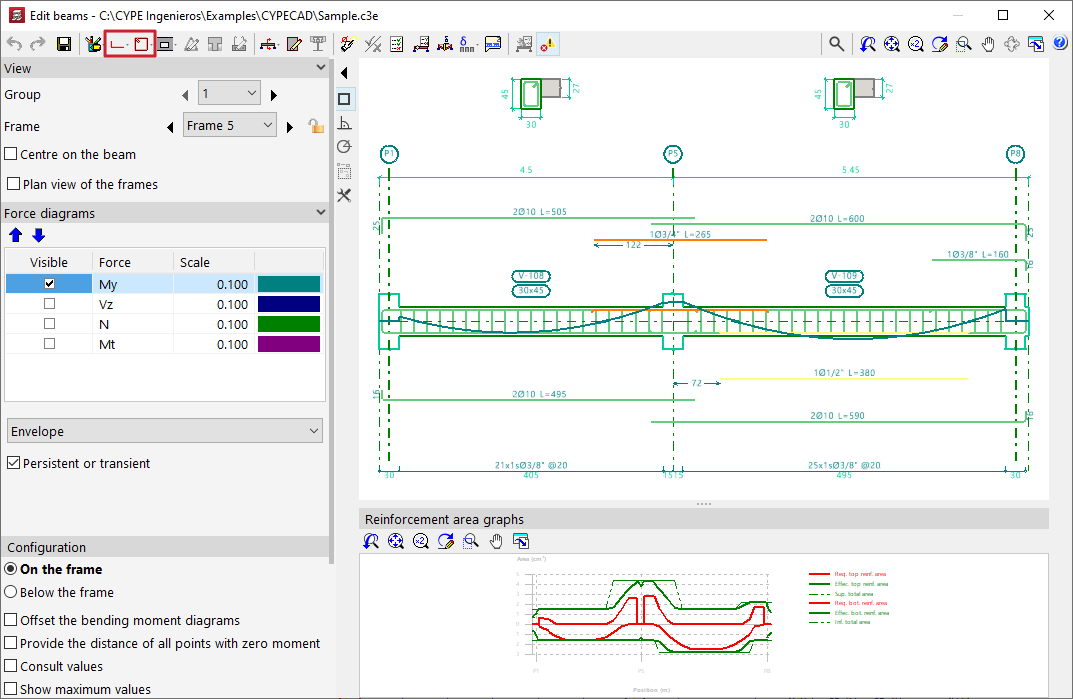
The reinforcement design carried out by the program will try to comply with the code checks. In any case, the beam reinforcement can be edited after the design from the "Results" tab, by accessing "Beams" and selecting the "Edit" option.