A job can be linked to a BIMserver.center project in the following ways:
- When creating a new job via the "File" menu, "New", in the "Project selection" window, tick the "Link to a BIMserver.center project" checkbox:
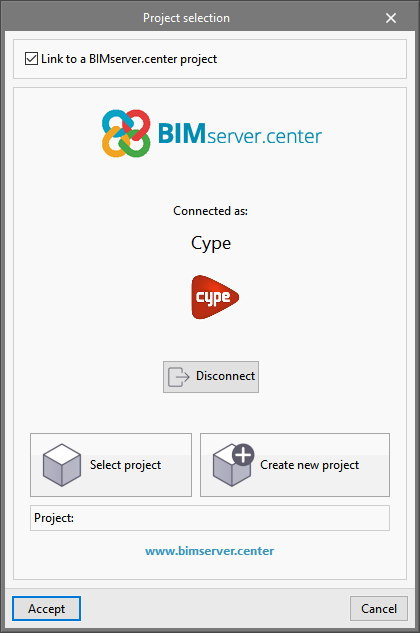
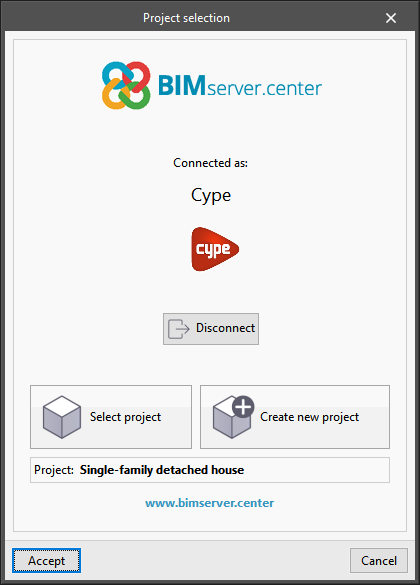
In the centre, if the user is not already logged in, they must log in with their BIMserver.center user name by entering the "E-mail" and the "Password" for their account.
Then, users can choose "Select project" to select a previously created BIMserver.center project or they can create a new one at this point with the "Create new project" option.
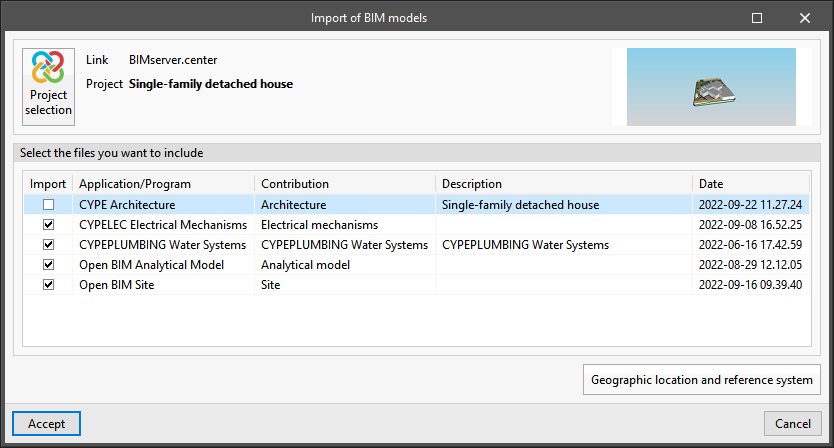
- When selecting a project that has already been created, after clicking "Accept" in the "Import BIM models" window, users can "Import" other files into the BIMserver.center project so that they can be displayed in the 3D view and the information can be read, depending on the program used.
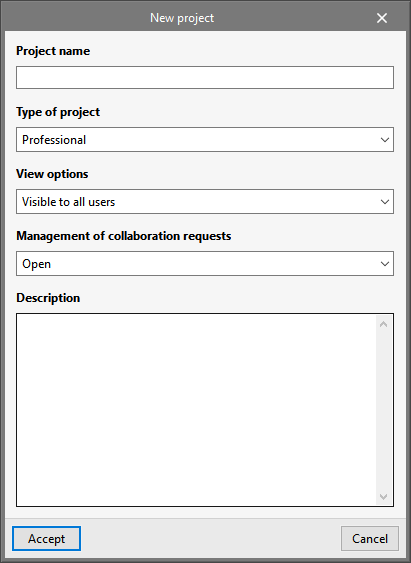
- When creating a project directly, users must enter the "Project name ", select the "Type of project", the "View options", the "Management of collaboration requests" and add a "Description":
2. When a previously created job has been opened and the BIMserver.center project to which it is linked needs to be checked or modified, go to the "BIMserver.center" section at the top right and select "Update":
This takes the user to the "Update BIM model" window, where they can review the files to be included in those that appear in the selected project.
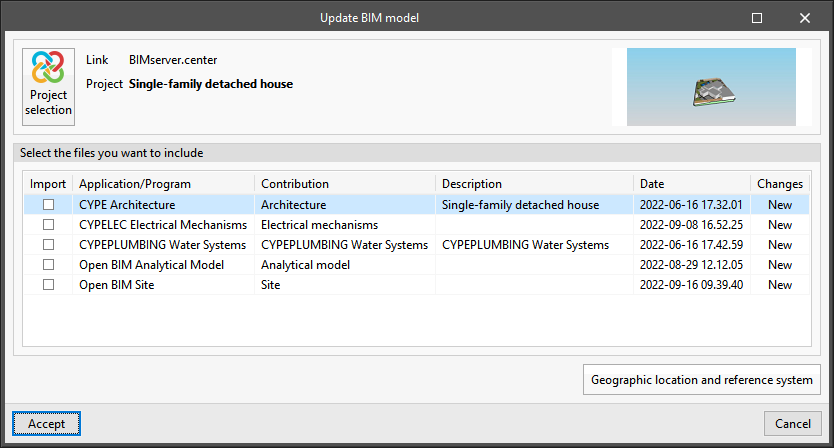
By clicking on "Project selection" here, the aforementioned window of the same name appears, where the project to which the work is linked can be modified via the "Select project" option, or click on "Create new project" to create a new BIMserver.center project at this point and link the job to it.