There are several ways to download and install CYPE software. Option "A" is recommended, as it allows users to manage all the apps in a single place, in a practical, efficient and versatile way.
- Download and install CYPE Menu (recommended)
From the CYPE Menu interface, users can easily download, install, uninstall and update the required apps. This option provides centralised management that facilitates quick access to the apps included in the license. - Download and install CYPE Menu. Full installation
This alternative allows users to install CYPE Menu. Full installation and, simultaneously, a set of pre-selected CYPE programs. This is useful in cases where installation is required on multiple workstations or when users do not have installation permissions, such as in a university computer classroom (using, for example, the campus license) or in companies with multiple operators and teams, as well as in cases where an unassisted installation is desired.
Note: The version of CYPE Menu. Full installation available in BIMserver.center usually corresponds to a lower version than the current version in CYPE Menu. - Download and install apps individually
Each app can be downloaded directly from the BIMserver.center platform, with no need to use the CYPE Menu. This option is suitable when only one or a few specific programs are to be installed.
Note: If a CYPE app is installed individually, the electronic license can be managed from its interface as indicated in the "Additional information" section on this page.
Below are the steps required to download and install CYPE software using the recommended option.
1. Register on BIMserver.center
First, you must register on the BIMserver.center platform. To do so, follow the steps below:
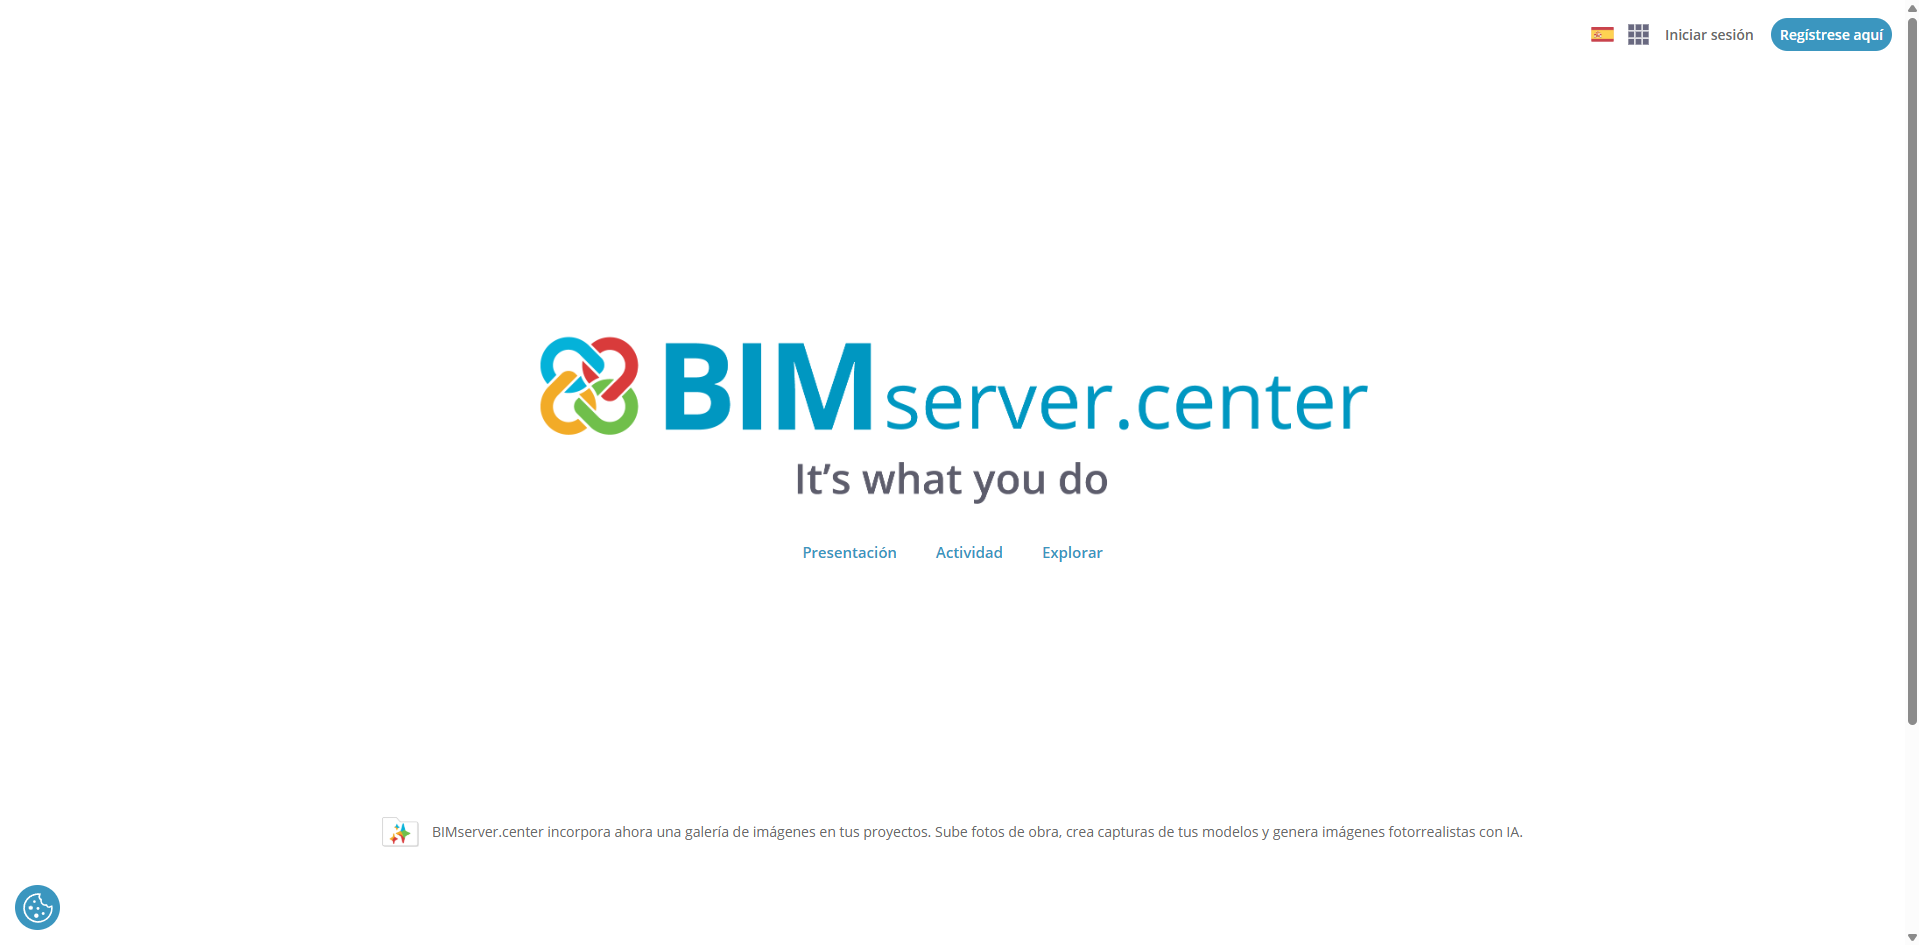
- Go to BIMserver.center in your web browser and click on the "Register here" button in the top right-hand corner.
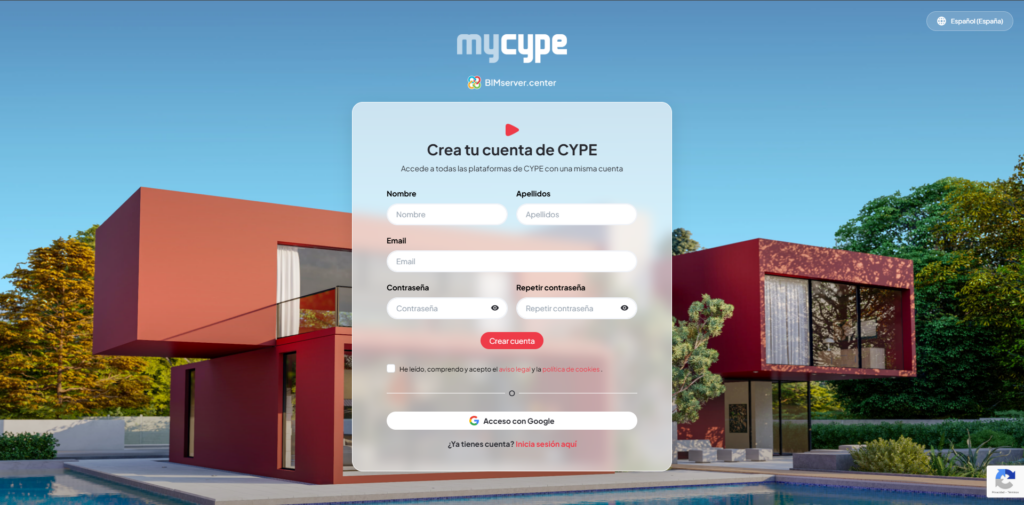
- Once you are on the registration page, enter your "Name", "Surname", "Email" and "Password". Then click on "Create account".
- You should then confirm the validation email sent to your email address. If it does not arrive, please check whether it has been classified as Junk Mail (Spam).
2. Sign in to BIMserver.center
Once you have completed the registration process, you must sign in to BIMserver.center using your account, as follows:
- Go back to BIMserver.center in your web browser and click on "Sign in" in the top right-hand corner. In the sign-in window, enter your "Email" and "Password" for your account and click on "Sign in".
3. Download CYPE Menu from BIMserver.center
On BIMserver.center, you can search for the app you want, for example CYPE Menu, and download it:
- The "Store" option takes you to the app catalogue. In the top left-hand corner, you can search for apps by name, category or tag.
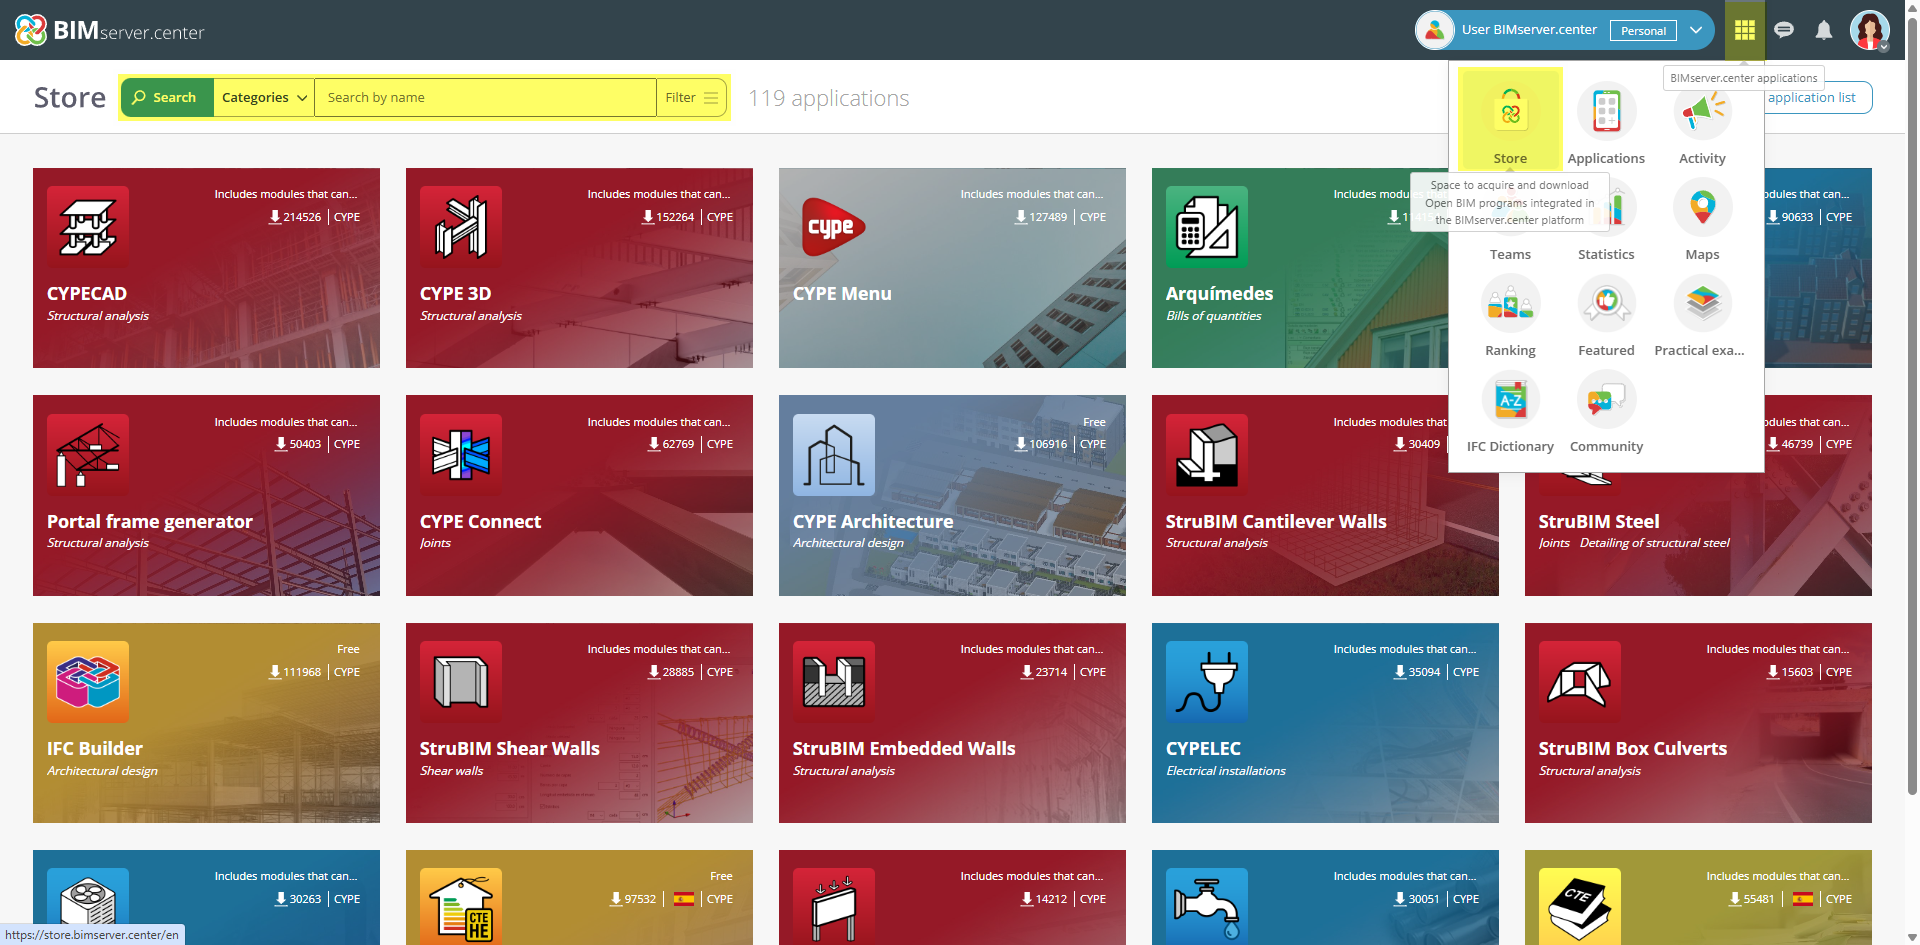
- When you click on the app you want, a window opens showing its details, with the "Download" button in the top right-hand corner. Clicking this will download an executable file to the specified location.
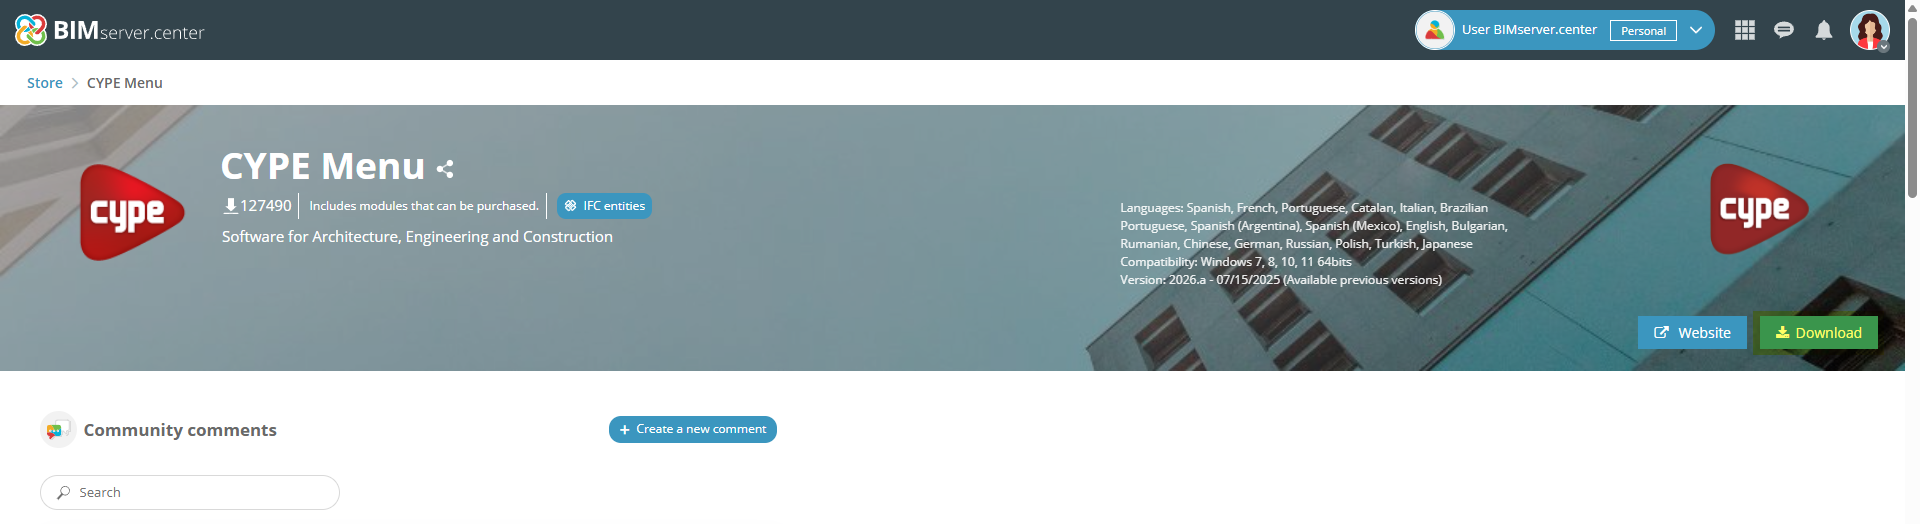
4. Install CYPE Menu
The file downloaded above allows for the complete download and installation of the application. To do this, you must follow these steps:
- Execute the downloaded file in your download path and select the installation language from those available.
Note: For versions before 2026.a, during installation, you must select how you want to access the program, with either a professional, evaluation, temporary or campus license.
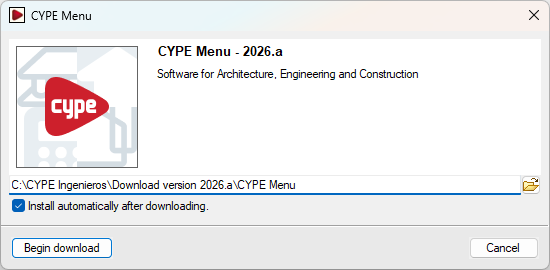
- The path where the whole app will be downloaded will be displayed. Check "Install automatically after downloading", if desired, and click on "Start download". If the directory does not exist, the program will ask for confirmation to create it. In this case, select "Yes".
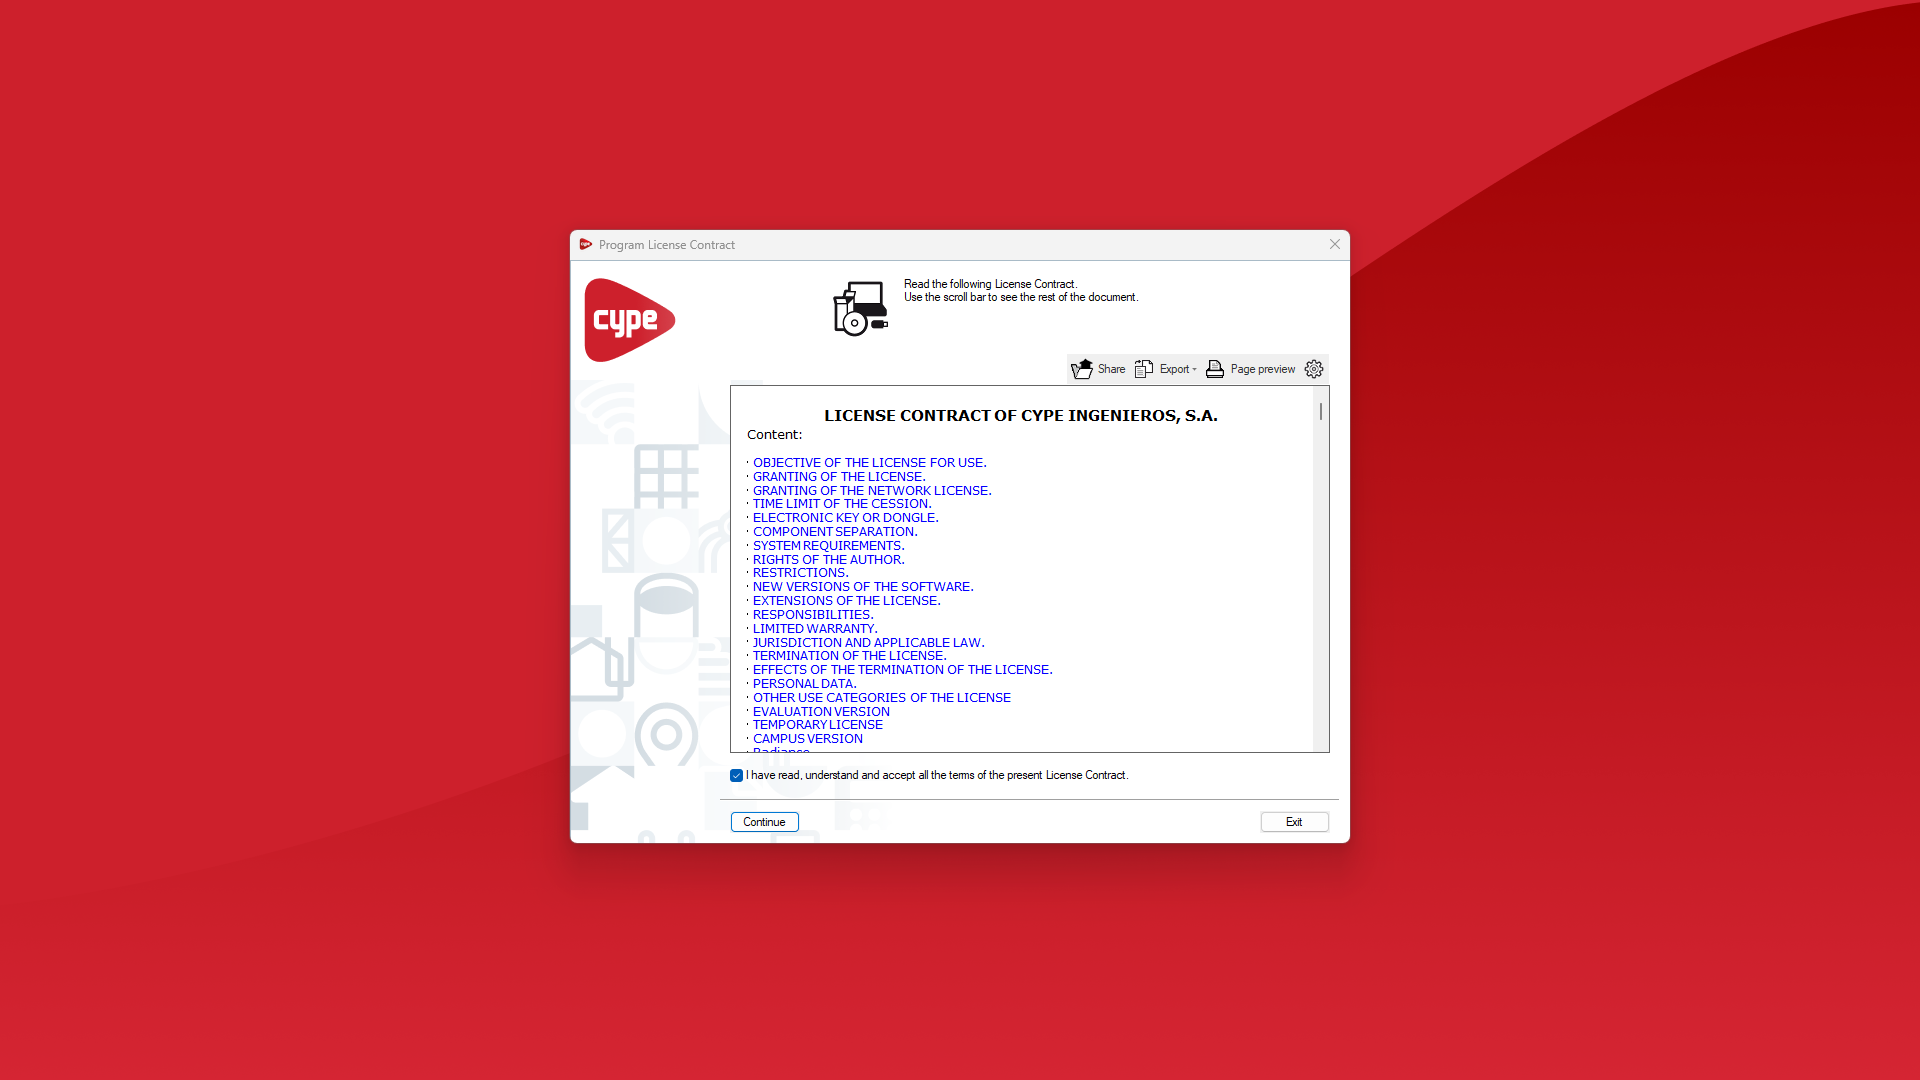
- If "Install automatically after downloading" has been checked in the previous step, the installation wizard will be launched automatically. If not, the installation executable in the appropriate language must be found and opened in the designated path, e.g. C:\CYPE Ingenieros\Download version 2026.a\CYPE Menu\Installation in English\Install CYPE Menu.exe. In the installation wizard, the License Agreement and the Responsibilities Clause must be accepted.
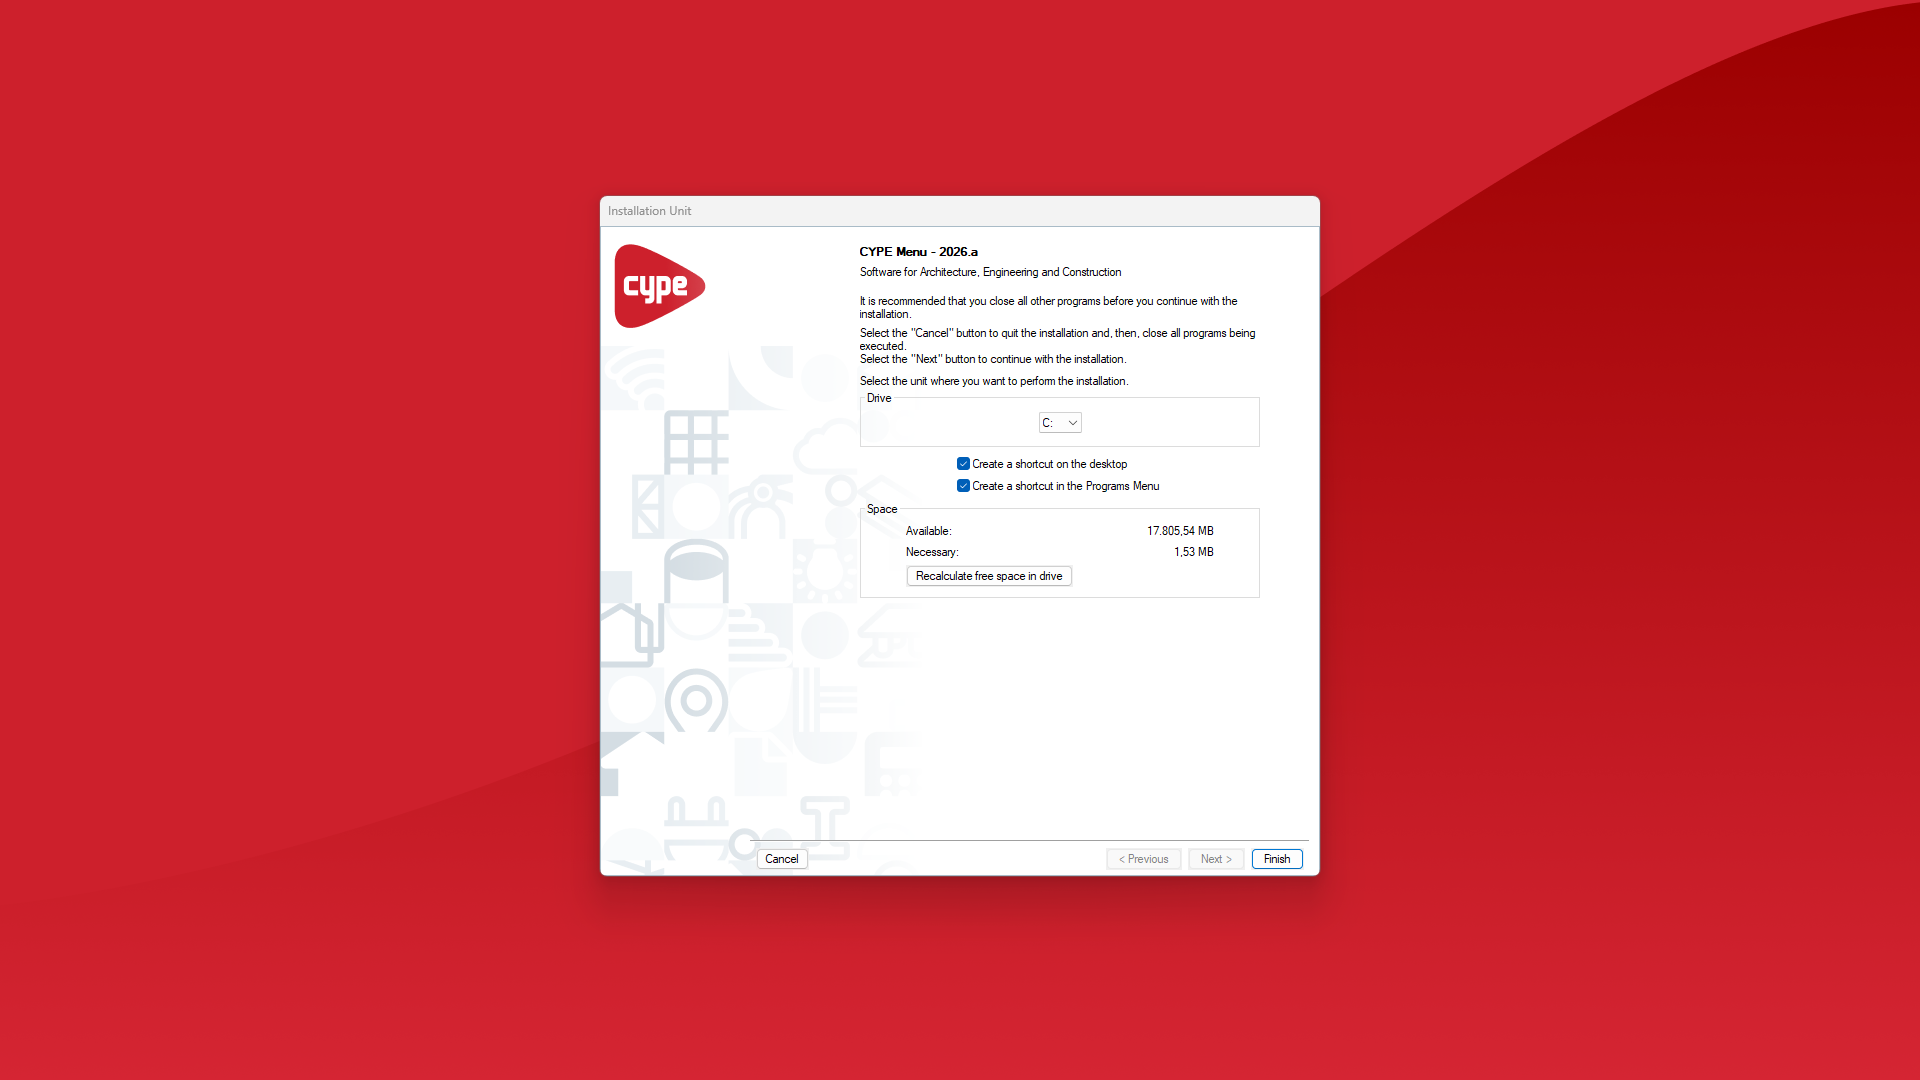
- Select the drive where you want the program to be installed. This will determine the installation path of the program. For example, the installation path for CYPE Menu 2026 is as follows: C:\CYPE Ingenieros\Version 2026\CYPE Menu. The boxes for creating shortcuts on the desktop and in the "Programs" menu can be activated, if desired. Finally, click on "Finish".
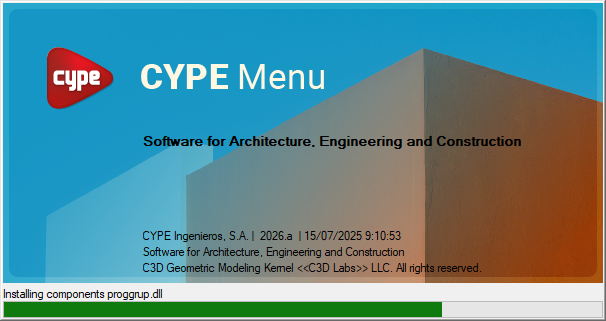
- The installation process for the program will then start automatically; this may take a few seconds, depending on your computer. Once complete, the app will open automatically. You will then be able to run it using the shortcuts created during the installation process.
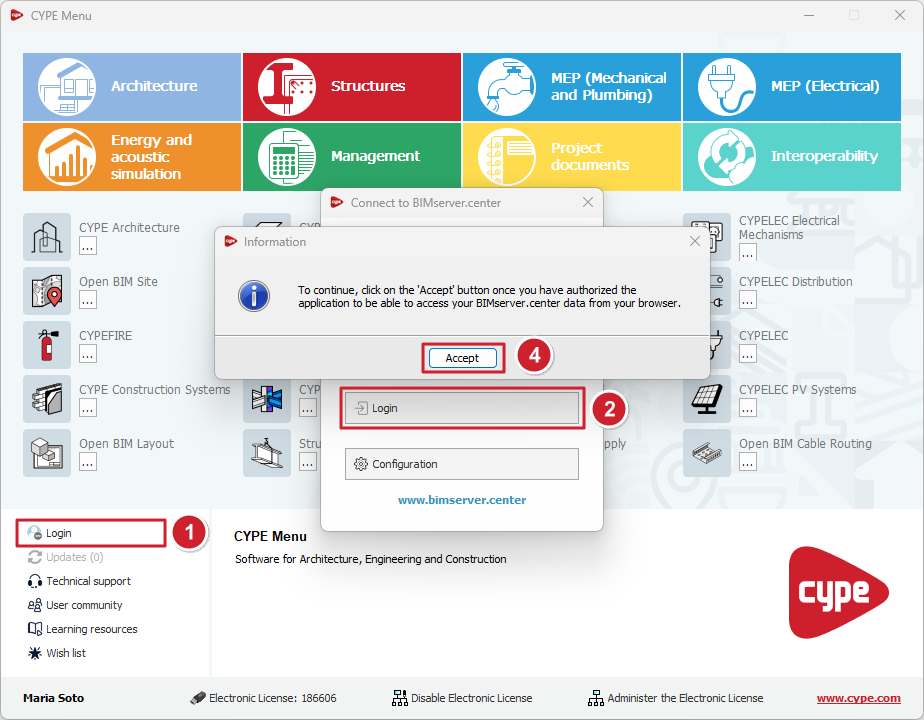
5. Sign in via the CYPE Menu
In CYPE Menu, you must sign in with your BIMserver.center account in order to be able to install the programs from the platform. As a result, the name of the BIMserver.center account will be displayed in CYPE Menu instead of "Sign in". In addition, the downloaded apps will also appear in the user profile on the BIMserver.center platform. The steps to sign in are as follows:
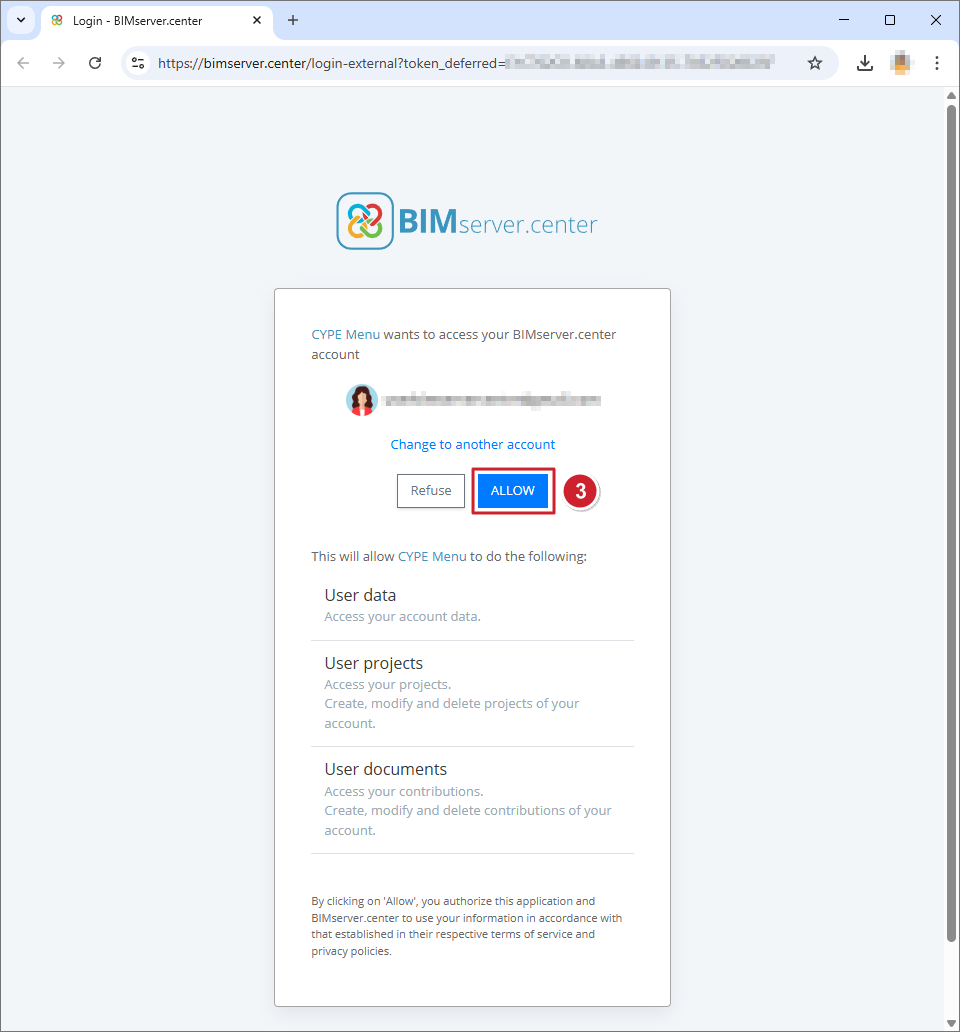
- Click on the "Sign in" option at the bottom left (1) and then on the button of the same name in the pop-up window (2). A tab will open in the web browser with the message CYPE Menu wants to access your BIMserver.center account. Here, click on "ALLOW" (3) and then on the "Accept" button (4) in the "Information" window.
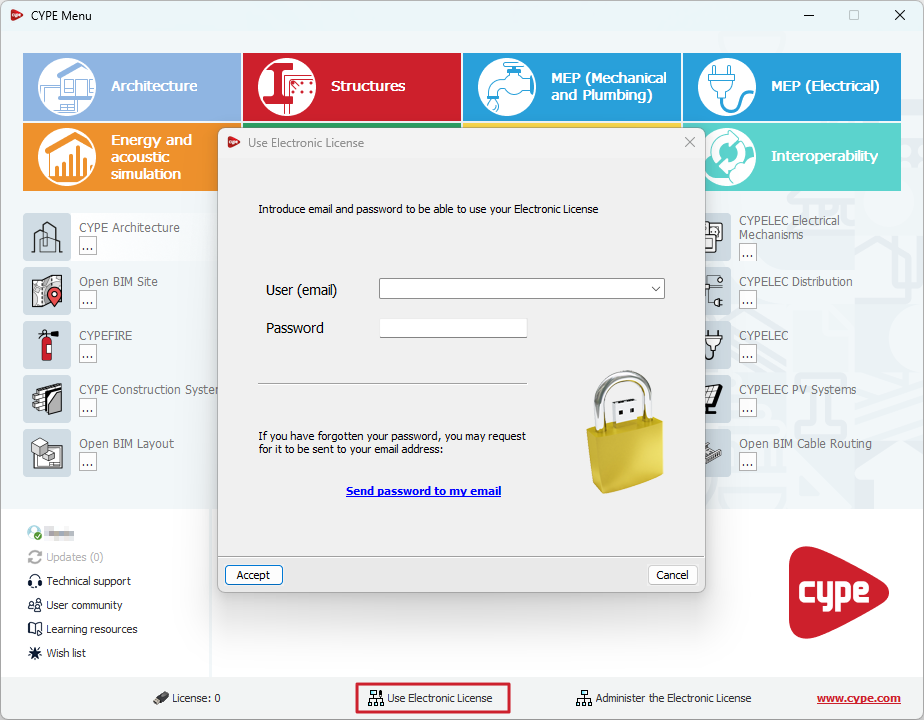
6. Use the electronic license in CYPE Menu
Then, also within the CYPE Menu, the email and password associated with the CYPE license must be entered by selecting the "Use Electronic License" option at the bottom.
Note: From version 2026.a onwards, this step allows you to enter credentials for any access mode to the program, whether it is a professional license, an evaluation license or a campus license.
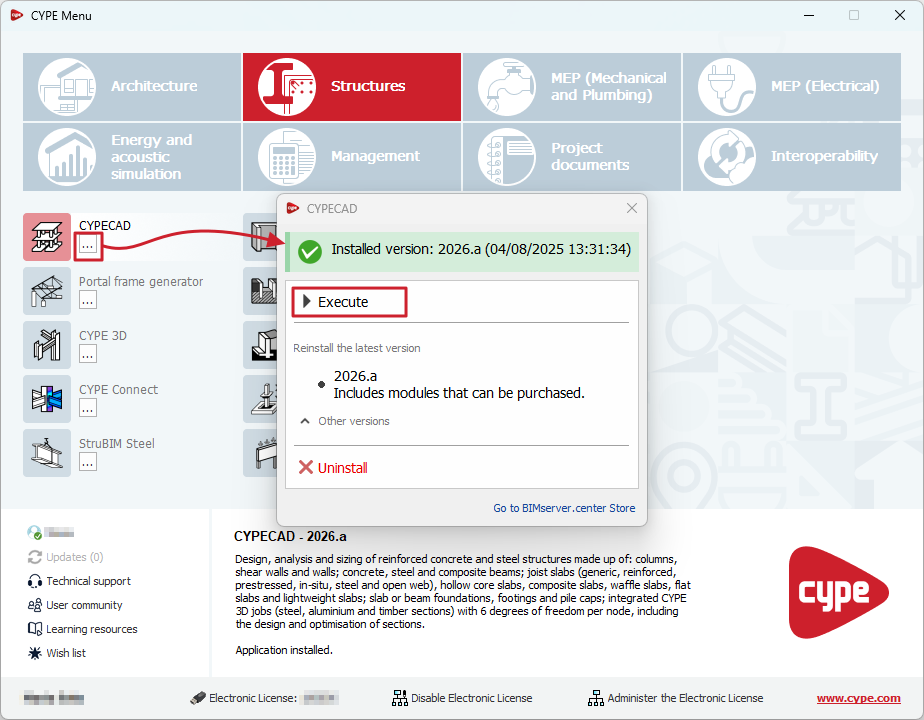
7. Install programs in CYPE Menu
To install a specific program in CYPE Menu, e.g. CYPECAD, the following steps must be followed:
- First, select the group of programs at the top, and locate the program you want to install in the middle. Then click on the
 button under the name of each program. This opens a window that informs you whether the application is installed or not. If the application is not installed, the most recent version or a previous version, if available, can be selected and installed.
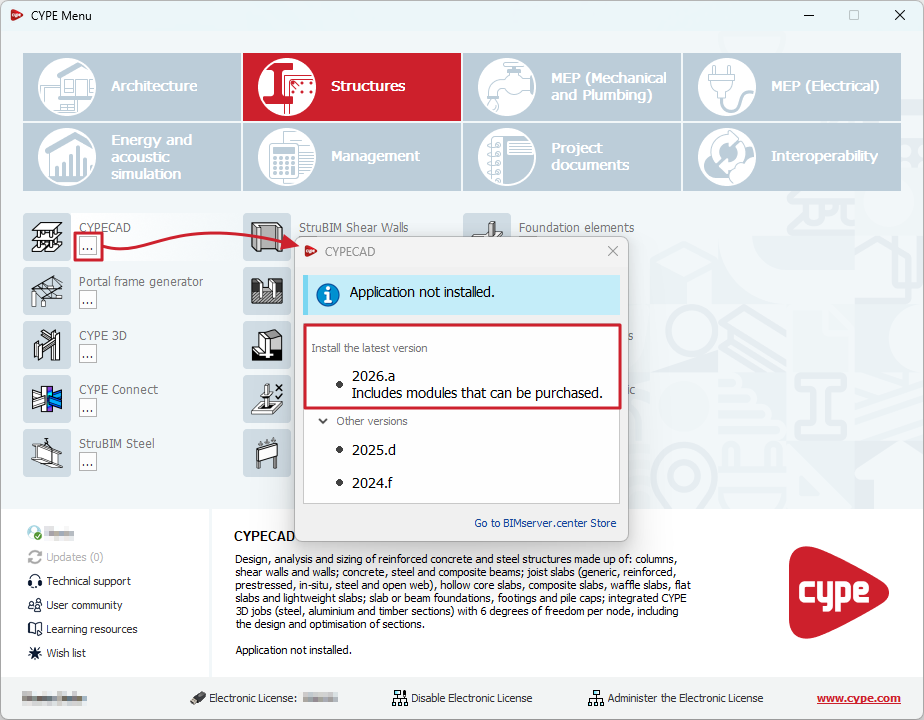
- In the window that appears, select the installation language of the program, and once this has been done, the download and installation process will begin. Once the installation process is complete, the program will open.
8. Run or uninstall programs in CYPE Menu
Once installed, the program icon will appear in colour in the CYPE Menu. By clicking on the ![]() button under the program name, the following will be carried out:
button under the program name, the following will be carried out:
- "Execute" the installed version of the program by clicking on the corresponding button, or "Uninstall" the program.
Additional information
Using electronic licences from the CYPE program interface
When installing a CYPE program that requires permissions, users can manage the use of the electronic license from the program's own interface. This is especially useful if the program has been installed separately.
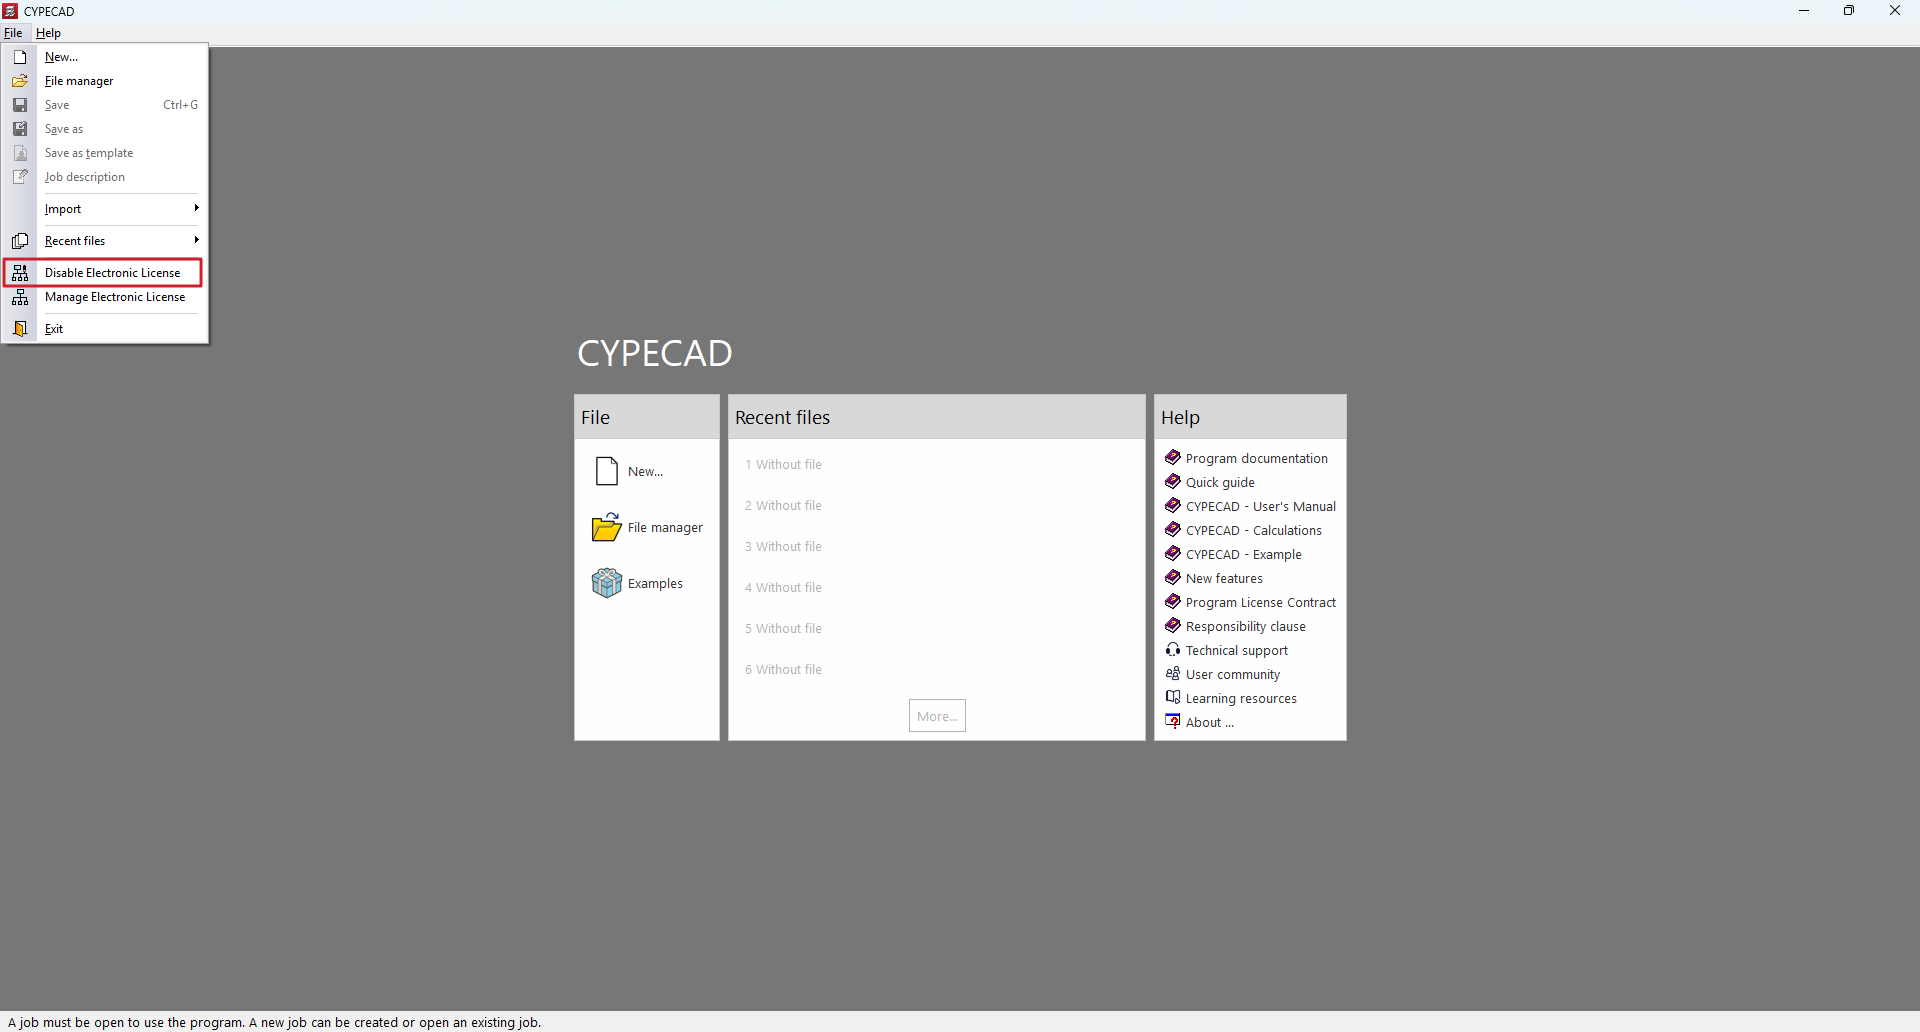
To do this, with the program open, click on the program icon in the upper left corner of the interface to display the "File" menu.

Then select "Use Electronic License" and enter the license email and password.

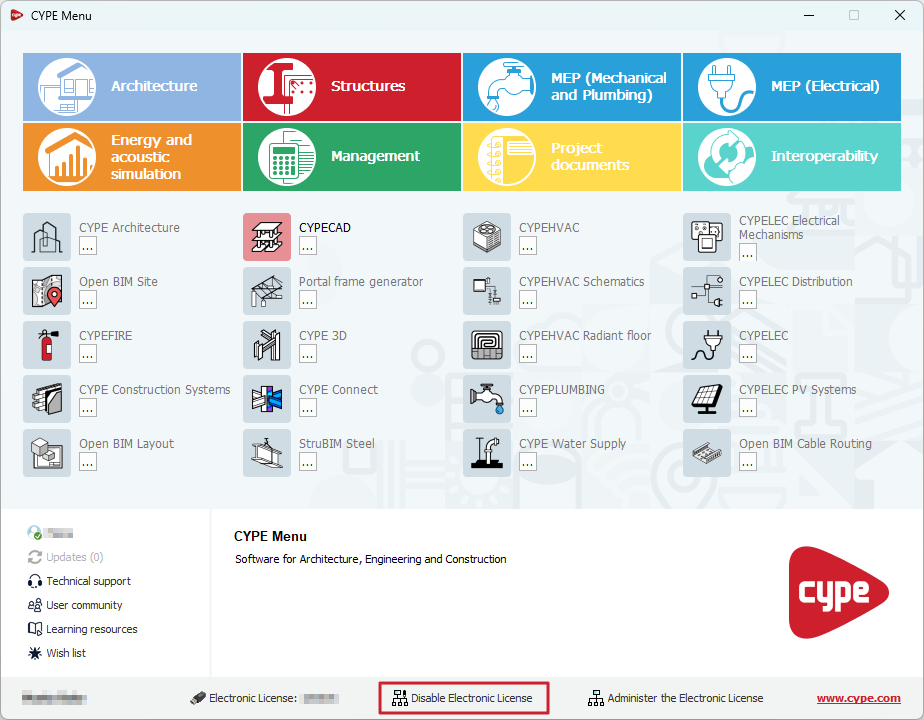
Disabling the electronic license
If an electronic license is being used, the "Disable Electronic License" option (instead of "Use electronic licence") will appear in the CYPE Menu interface or when opening the "File" menu again within each program.
Clicking on this option stops the electronic license from being used, allowing it to be used on another device.